 |
 |
 |
 |
 |
 |
 |
|
"A planet is a creation, that, when done properly, will convey endless levels of detail from the prominently visible all the way down to the merely implied." - Greg Martin (Capturing Heaven) By far the
most asked question I receive is "how do you create planets?". This tutorial or guide (call it what you will, it teaches) combines the most useful techniques I've come across in different planet creation tutorials and my own "secret" techniques I've developed by myself or with the aid of others. With that in mind, I already credit dinyctis, Greg Martin, UCD, and Brandon Hale for their help, indirect or direct. This guide is NOT meant to be a simple ten minute view into creating a planet. Planets are present in nearly every space art picture you'll find, and there is no reason why you should spend a meagre amount of time on them. Pour enough effort into them, and they'll become the jems of your art. Greg Martin posted a Planet Pull Apart that pretty much demonstrates the level of detail involved in creating a wholly impressive planet. Yet it's still disappointing to see the vast amount of artists still using the texture he uses in his own planet creation tutorial. How will you learn if you don't go it alone? To that end, you will learn how to create your very own planet texture in this guide, something nobody else can touch. This tutorial assumes that you have a good grip of basic photoshop functions, and some footing in more advanced features. Some astro-physics knowledge would help a lot too, but that's not necessary. Some of the instructions given also involve windows shortcuts. Finally, I do hope you can learn from this tutorial, both scientifically and artistically. One last thing to consider in this guide is what is merely my personal preference, and what is "law". Just because I do it a certain way doesn't mean you must adhere to that also. Experimentation is the key towards learning. Develope your own techniques and you will feel much better about your art and the way you work in general, I know that at least that applies for me. ...ok one last thing. I sincerely hope you have read Greg Martin's Capturing Heaven article, and for this tutorial at least, paid specific attention to what he says about planets. Your art will only get better if you understand more about what you're creating, rather than just slapping things onto a canvas and screaming "move over picasso" at your monitor. |
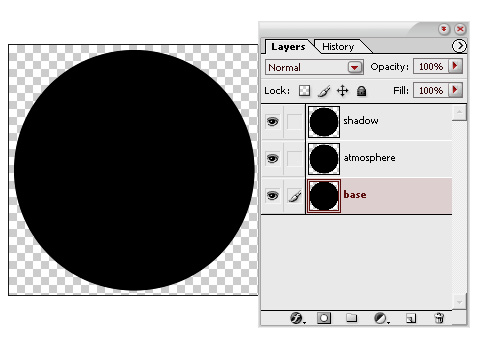
First thing, always work in a large document. Anything above 2500*2500 pixels is acceptable. Why? not because we like making your computer slow, but because you're free to descale for quality reasons, and you give yourself a lot of situations where you can use your planet. Use the elliptical marquee tool whilst holding down shift to create a perfect circle shape, fill it with black. This area of the tutorial is pretty similar to dinyctis'. Duplicate your circle twice and call the top "shadow", middle "atmosphere", and bottom "base". Not difficult at all.
"...the idea that a multifaceted infinitely complex planetary body can be meaningfully distilled down to a simple sphere with a texture mapped onto it, is, in a word, obscene." - Greg Martin
This is essentially where my part of the guide comes into its own. Texture creation for the planet. Now I've always asked "why should a planet be limited to one texture?". Whilst occasionally one texture provides all the diversity in a planetary surface you need, multiple textures manipulated well give you the control and the edge. Greg Martin showed that planet pull apart that wholly emphasised what he meant by that above quote. What this part of the tutorial will do is show my method of going about this.
So where do you get textures from? Personally, I take them from my own camera of various objects i find. Guitar strings, wallpaper, meshes, paper bags, wood grain, and biscuits, many things have potential. If however you just want to get right there, check mayang, imageafter and the stock exchange (bearing in mind the stock exchange will require you to register and mayang has a download limit). Now.. think about what kind of planet you want to create.
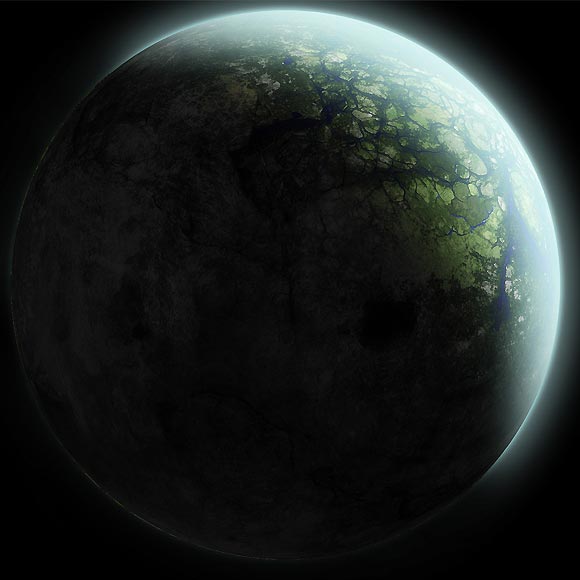
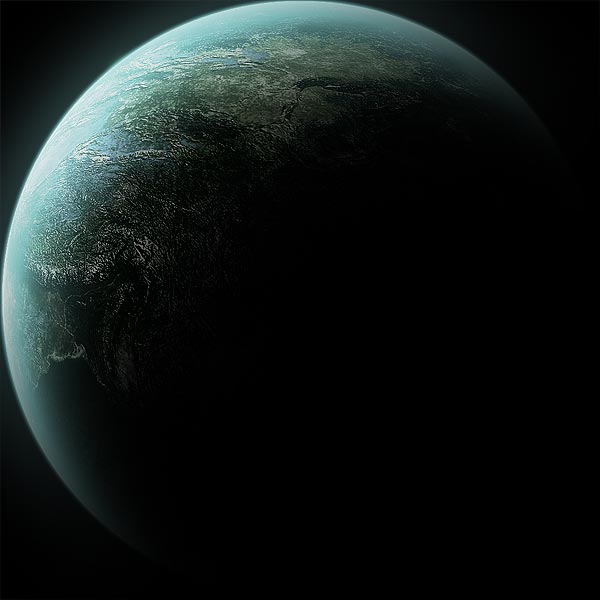
Most space artists will just grab a texture from a website such as mayang and apply a spherise filter to it, not giving any thought about their planet at all. This is all well and good if you're not looking for that detail factor, or just practising technique, however, I'm going to push for a little more thought towards your planet creation. I'll be using our very own solar system as a model to reference from in this guide, as most people who read this should have some little knowledge at least of our system.... hopefully (I do hope I don't assume too much here...). First of all, consider its place in the piece. How far is it away from the sun? Consider Mercury. The closest planet to the sun in our system, is red hot, with searing temperatures. What does heat do to landforms? At least, don't expect any lakes. For variety, also take into mind Venus, with its lava flows. Atmospheres, some planets are deathly poisonous with very thick and ominous gases drifting, smothering the terrain. Therefore solid rock viewing is obscured, visibility decreases. Moons, consider our own moon. Cratered, often atmosphere-less. Rocky, potentially could have some mountain ranges depending on the size. Finally, habitable or not? Take our Earth... do you want forests? seas? rivers? volcanoes? just think of such landforms and ask yourself if you want them to be included and would it be plausible if they were to be included. Creating the right texture is as complex as you make it to be. Note - Some artists take it upon themselves to download real planet textures from NASA sites and just spherise them, no manipulation. Often then providing these as resources and reaping vast rewards from minimal work. You don't learn anything from this. Whilst there's nothing really to stop you from doing it, you just don't benefit from it whereas if you spend enough time developing your very own texture, you'll be better off. |
So, open up another new .psd document with resolution larger than your planet
working resolution. Say... 3500*3500. Select your textures carefully. Some of
my favourites happen to be the venusian lava flow textures you can find around,
however many rock based textures are just as adequate for the job. Entirely
up to you, as all can be manipulated for your needs.
Now what I will
do here in order to make the process easier is to find a large resolution real-planet
texture such as mars or even earth, and manipulate onto that. So I have found
a mars texture from ...WEBSITE... and will apply textures onto that. Now when
using real textures the trick is to hide the source, so remove aspects of the
texture that are easily recognisable. For example, with mars remove the valleys
since they are pretty much the most recognisable characteristic of the planet.
The best way to go about this is to clone different parts of the texture on
top of it.
N.B - If you're really confident at this method of texturising,
find a different texture to use as a base, because in most cases, your finished
product will be so far removed from the first texture, it doesn't matter what
you start off with. I'm just using Mars as a DEMO.
So the "trick" is to simply make this texture be as far removed from the original as you can make it, but don't stray too far away from the original aim of what style of planet you're creating.
The next thing to do before manipulating your own textures on top of that is to desaturate everything. Don't worry about recolouring the image, that is covered later. But this is purely to make the manipulation process easier.
During the manipulation
process you're going to get familiar with the following three blending modes
in particular.
- Soft Light
- Hard Light
- Overlay
Different textures to apply require different blending modes to achieve the
best effect. It's up to you to experiment. It's also worth
playing with the layer opacities. Do not forget that the more layers you add
over the top of each other using the above blending modes, the darker the image
will become in certain areas, creating a more "dense" look. Your planet
texture will be better off if you attempt to achieve a uniform level of texture
density throughout, rather than incurring some large anomalies that would damage
your planets appearance, so take care with opacities etc.
Do also remember to pay particular attention to the middle part of your texture map over the outer regions. During the spherising process the outer regions get lost, leaving you with the inner parts. So pay them special attention.
Now to avoid dragging this out to unnecessary levels of detail, I'll show a buildup example, and some finished examples.

Notice how the texture gradually builds up to look less and less like the original? That is the aim. And YES, it looks like an unworkable mess, but remember, appearances can be deceptive, and in this case, they most definitely are.
Here's another example of a finished texture.

Just to prove to those who doubt the buildup example texture, here is a quick planet I made from it.
and the second finished texture gave a planet looking like...
So, in the next page of this guide I will demonstrate how this texture can applied and coloured (because you don't want a black and white planet, do you?).
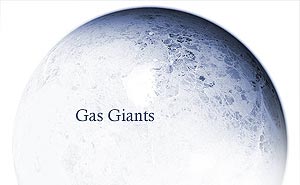
However before we progress there, there is still another variety of planet we haven't covered. That being the Gas Giant. Creating a gas giant seems easier than the previous style of texturising, but perhaps not, especially if you study what they're composed of. A common, more popular method of creating a texture for the gas giant planet is by using gradients. However, this creates a very simple, linear effect. Gas giants can have some more complex looks to them at a closer glance, swirls and more distorted regions of the texture, representing storms and other meteorlogical elements. Fact is, gas giants have a huge number of layers, storms and other meteorlogical elements. They're still immensely complicated.
So how do you create them? The above texturing method still actually works fine. It's just about choosing your textures more carefully. First, instead of using a texture base, use a gradient base, keep it smooth though, no huge contrasting transitions. Then apply textures on in greyscale, but ensure that the textures have a linear motion following the line of the gradient. Using wood grain textures is a good bet, and the knots are good for simulating swirls in the gasses, storms perhaps. It's all pretty much the same as the above.
Check DKF for some superb Gas Giant examples.

- Desaturate
everything when texturising.
- Don't let your texture get too dense/dark, it becomes more
difficult to manage, and later, colour.
- Use the same texture twice if you want, just make sure you
rotate, flip, distort... change the appearance so people can't see that.
- Apply textures to brushes and brush your texture if you want,
if you are more comfortable with this approach.
- Paint details if you want, there is no limit, add in your
own details with your brushing skills. It's completely up to you deep you wish
to go.

Texture
Developement By Brandon
Hale
Capturing Heaven
By Greg Martin
Planet Pull Apart
By Greg Martin
| |
|
|
|
|
|
|